Showing posts with label additive-free. Show all posts

Sunday, July 16, 2017

Soaked and Brined Black Beans

It's been a long time
I shouldn't have left you
Without a dope read to munch to...


I've been busy procreating, ukulele'ing, moving, homeschooling (briefly), volunteering, childraising, PTO'ing, adulting, and mom'ing for the last couple of years and this blog has taken a back burner. I've got almost 10 or so recipes sitting in my draft folder but they are still gathering virtual dust. Sigh.


But-- 

I was struggling for a savory bean side dish for a communal burrito potluck for our annual campout. When/if I make beans, I go to animal fat for the flavor boost. Since our Holistic Moms chapter had Muslim families participating, I needed something halal so my go to lard and (Buddhist) duck fat were not going to make the cut. (And I didn't have time to run to the local halal butcher...)


Then I remembered...

Beans, beans the magic fruit, the more you eat....

Kombu which would give me a savory/umami boost as well as help breakdown the indigestibles (toot-source) like oligosaccharides and phytic acid. I am not even going there with the soak-no soak debate. I know what my gut feels like. Which my family has now dubbed mom bombs. Soaking is just better for me.

Along the way, I discovered brining for beans and of course, I am a big pressure cooker proponent. Because: from phrozen to Phở in under an hour is too damn easy. I upgraded to a Kuhn Duromatic 12 qt when I birthed the big little because that's a lot more people to feed and I was tired of having to make two batches of phở with the 6 qt because the bones take up half the pot. I still keep my 6 qt Fissler because I inherited it from my 

bà ngoại | grandmother and it's handy for grains, side dishes, and small quantities.
I pre-date the Instant Pot so I don't have a review or a rave, but believe me I am eyeballing it. I only have to babysit the pressure cooker for less than an hour at most, but the prospect of set & forget it is very tempting because I am very forgetful...)

Anyhow, I cobbled together a recipe from various ideas with Cuban inspiration. And it was like sooooooo good. 
I got rave reviews and recipe requests from folks, so... here's the recipe, Samrana! 
( I made 2.5 lbs for 30+ people including littles which left me with maybe 1/4 of a pot leftover, this is a reduced quantity). 

Some ingredient notes: my kid doesn't like the tannic-ity of olive oil, so I mixed it with avocado oil. I used a little fresh garlic that I had on hand, but mainly I rely on powdered or dried/minced garlic because I have issues with digesting fresh garlic unless it is cooked AF. I wanna say I got the kombu powder from Frontier, but I think they don't carry it any longer. You can substitute dried kombu instead or omit it. Um, I eyeball quantities, so adjust to taste!


We were camping there was no way to pretty stage beans.


BRINE BEANS
1 lb beans (I used organic black turtle beans)
3 tbs of sea salt
4 qts water

Soak 8 hrs to 24 hours. Drain beans.


Ingredients


EV olive oil + avocado oil
1 organic sweet onion, chopped
1 tsp organic garlic powder
1 tsp kombu powder or 4 inch strip of dried kombu
dash of Red Boat fish sauce
2 bay leaves
2 qts water
chopped cilantro to garnish

Splash a super generous amount of oil in the pressure cooker. Sauté the onions and garlic until translucent. Add kombu powder, fish sauce, cumin and bay leaves and sauté briefly until aromatic. Toss in the beans. Cover with water, lid it, and bring to a boil. Cook at pressure for 4 minutes for soaked black beans (all other beans consult this chart for cooking time). Turn off the stove. Let it depressurize naturally, approx 10 minutes. Taste, add salt or other seasonings as needed. Top with chopped cilantro.

BOOM. DONE. 

Really, that is it. I love my pressure cooker

I have NO idea how long this takes in an Instant Pot. I know that it would take 3-4 hours in a VitaClay and that is why hands down, my pressure cooker is my go to because I suffer from the inability to meal plan.

[Full disclosure: I am now an Amazon Associate. Yes, I assimilated. All kidding aside, all my labor is unremunerated. Both as a mom and as cook. Don't get me wrong, I like getting paid in gratitude and sticky kisses from the littles, but it would also be nice to be compensated even a pittance for the fraction of the work I do IRL. I've made enough to buy coffee from individual affiliate links so it really is a bit ridiculous. And alot of the links I have are not remunerated, like Frontier or articles, blogs, etc. So for what it is worth, for less than the price of a cup of coffee, you can support my labor which is vastly undervalued!]


Thursday, April 16, 2015

Seaweed & miso soup

Since I am pregnant, I've been revisiting the pregnancy and postpartum soups in my repertoire.

I was introduced to Miyeok Guk 미역국, a traditional Korean soup eaten on birthdays and postpartum, by my dear friends celebrating their birthdays and when I had my daughter. This is a deceptively simple, powerhouse medicinal soup! Seaweed is nutrient-dense superfood packed with calcium, vitamins A, B-12, C, K, iodine, potassium, chlorophyll, soluble fiber, helps to regulate estrogen/estradiol, and on top of that it binds to heavy metals in the intestines and helps to leach them out of your system. Yay for seaweed! (And yes, I know Fukushima has altered the radiation content in the Pacific and iodine which is abundant in seaweed binds to radiation. But I figure, it's all getting flushed out. Literally. Atlantic seaweed is harder to source and frankly, the US specialty companies that do so charge ridiculous prices. We do what we can and make compromises.)

There are dozens of varieties of edible seaweed. You should choose wakame (which I know is a transliteration of Japanese not Korean) or Miyeok (see, Korean). Though I have very rusty, phonetic reading ability in Hangul | Korean (courtesy of free language class at the Korean Cultural Center in LA way way back--did I mention I also got a BA in linguistics and had/have an affinity for languages?), I lack comprehension. So whenever I am in doubt, I look at the picture and make sure there is a bowl of soup on the label.

I start with Junghee's mom's recipe which she shared with my mom after I gave birth. I use other non-traditional nutrient-dense ingredients to amp up the nutritional profile. Miso adds probiotics (and if you really want to go the extra mile, add GMO-free organic natto for the Vitamin K2). stopped eating soybeans some years ago because of the phyto-estrogens (big deal for women of childbearing age) and the GMO issue.  Every now and then I will make an exception for organic, fermented soybeans.  So this is another one of my exceptional recipe for fermented soybeans. Read the labels for miso & natto carefully to make sure it's organic, GMO-free, MSG-free and is naturally fermented with koji cultures (rice or barley malt). 
Natto has a very strong challenging flavor so you may want to omit if you don't like stinky ferments.  


You can use a bone broth base to have a more rich soup base and/or use fish sauce and dried bonito flakes (be sure it doesn't have MSG though!)  If you are using shellfish, the juice from the shellfish will also enrich the soup base. My favorite is clams because they are high in iron and with the seaweed combine to make a blood building/fortifying soup that is perfect for moon cycles, pregnancy, postpartum, and post-surgery. This has been a great boost for me when I start feeling fatigued from the crazy things pregnancy does to one's body. I try to eat it at least once a week or so. When I am too busy to get fresh clams, I used canned. I know. Totally not as good, but way easier to store and have on hand in the pantry. (note 1/15/2017 I've since discovered frozen clams at Whole Foods. Infinitely better than canned!)

This is one of my daughter's favorite soups. Once when she was a toddler, she ate a huge adult sized portion of it. And then at bedtime she puked black-green goop all over the bed which I had the parental sixth sense ability to catch in my hands. Mostly. Good times.


Ingredients

  • ~1 cup dried Miyeok/Wakame seaweed 
  • toasted sesame oil
  • garlic (optional)
  • sea salt
  • 8 cups water or bone broth
  • cubed beef steak, whole cleaned clams (shell on), canned clams including juice (choose an additive-free one), shellfish, and/or cubed, organic/GMO-free soft tofu
  • 1-2 tbs of Red Boat fish sauce and/or bonito flakes (make sure it's additive-free)
  • 2 tbs of organic, GMO-free miso to taste
  • organic, GMO-free natto (optional)

Directions

1.  Soak seaweed in water for 10 min in filtered water.  Drain. Massage in sesame oil. Use kitchen shears and cut into bite sized pieces.
2.  Add sesame oil to pot and saute seaweed for 1 min.  Add garlic (if u want) until it warms up.  

3. Add beef if using and sauté for a few minutes.
4. Add bone broth or water, fish sauce and/or bonito and bring to a low boil. 
5. Add shellfish if using and low boil until just cooked--the clams open up (~5 minutes).
6. Add tofu if using until it's hot.

7. Turn off stove.  Add 1-2 tbs miso and natto if using.  Sea salt to taste. Serve.

Tuesday, January 13, 2015

Chả Lụa | Silky pork sausage


Chả Lụa is a classic & ubiquitous Viet sausage roll that is traditionally pounded into a silky paste, wrapped in banana leaves, and boiled. It's found in bánh mì | VN sandwiches, bánh cuốn | rice rolls, among many other dishes. Like deli meat it can be eaten as a snack; one of my favorite ways to eat it is a mini-sandwich with bánh dầy | mochi.

Typical store-made Chả Lụa has MSG/hydrolyzed wheat protein and potato-/wheat-/cornstarch (likely GMO) and they also wrap the roll with a final layer of plastic wrap  or aluminum foil before boiling or use nylon twine--all of which release toxins/carcinogens when heated. So Chả Lụa has been off my menu for several years now unless I've got my additive-busting supplements with me.

This was a team effort. My thoughtful husband made the first batch when I was enduring first trimester ravening hunger pangs. I made the next round.

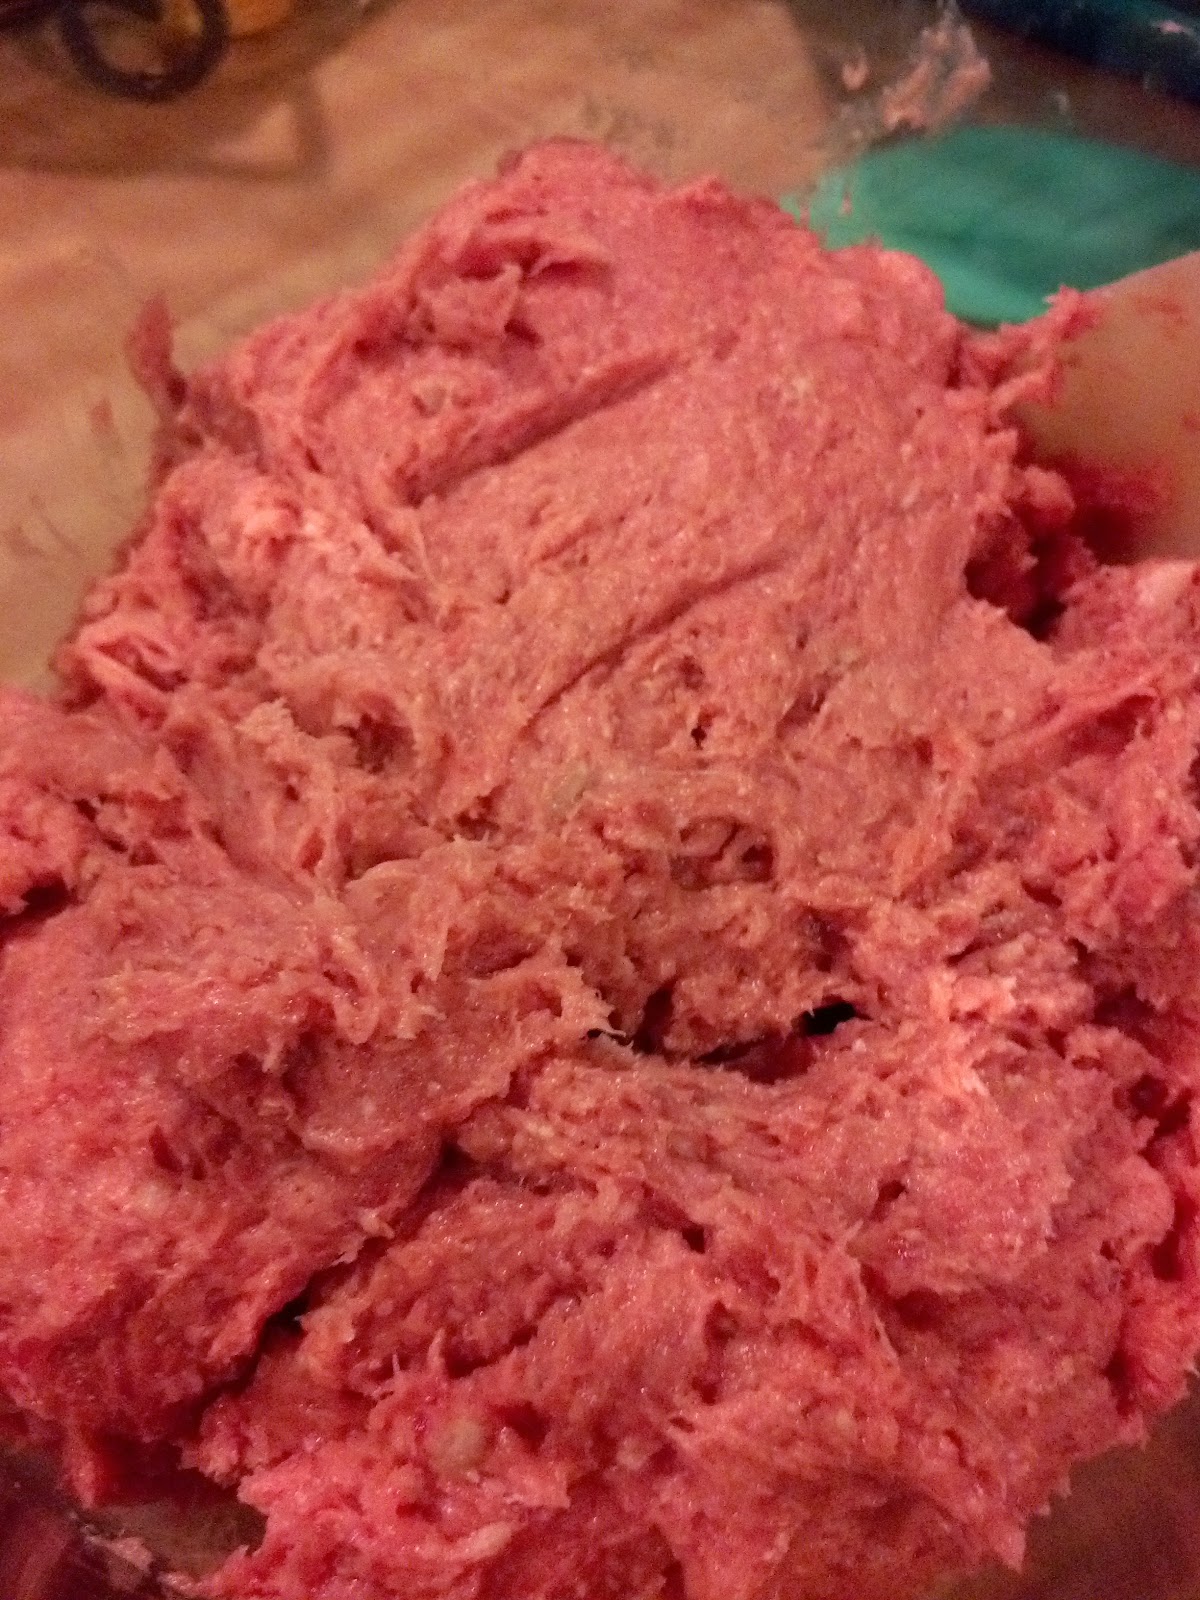
Like many of these traditional dishes that seem so challenging, I found that making Chả Lụa itself was not hard, but it required time investment in the wrapping & cooking. Because I like my modern tools, I used a food processor to render the meat and fat into a paste (similar to what one would do for meatballs). It only takes 10-15 minutes to get through 3 lbs. Easy peasy. We tried the grinder and it was double the work to then process the grind, so skip that step altogether. 

The first round, my husband tried the recipe from Bach Ngo's The Classic Cuisine of Vietnam; he wrapped with one layer of banana leaf and boiled the 3-4 rolls for 40 minutes. We ended up with a lot of waterlogged rolls. It was a good effort, but even without the waterlogging, why add water to recipe and then starch to firm in the first place? Also it was not salty or flavorful enough but that could be the waterlogging issue. The next time, I eyeballed Charles Phan's recipe and considered it too plain (only 2 tbs of fish sauce?!), pork belly too fatty and more headcheese-like with pork belly skin-on, which is a different and also delicious variety of Chả Lụa  called chả bì. So I fused some of the simplicity of Phan (added salt, no water, no starch, no additional refrigeration) with Ngo's recipe (more fish sauce, baby!), and per my usual modus operandi, we used higher quality ingredients. I believe the quality of the ingredients truly makes or breaks a recipe. 

The trickiest part is wrapping it to make it waterproof. We can source fresh banana leaves in the Bay Area at Latino/Caribbean markets or people's gardens, but typically I buy the frozen imported kind at the Viet or Latino markets. The banana leaves need to be rinsed and wiped down to remove any chalky residue. My mom recommends blanching the defrosted banana leaves in boiling water to make them more pliable, less likely to tear. [2/1/2015 note: Mom also says use banana leaves from Thailand, not the Philippines and to cut off the rib for pliability.]

We are still working on wrapping technique; I used double or triple banana leaf layers and wrapped it like a burrito (i.e. rolled and tucked in the ends which are held in place by twine). I only used a single criss cross which was't snug enough; I would recommend the roast tying method. I also went with Phan's steam cooking to reduce the waterlogging though I employed my pressure cooker to shortcut the time.

I picked up nice country ribs (butt) from Whole Foods; this is a flavorful fatty cut from sustainably raised pork and in the bulk pack (3 lbs+) it's a reasonably priced $4.99/lb comparable to what one would get buying direct from the farmer. If you must use conventionally-raised pork, my mom recommends soaking it with lemon juice and water overnight to "sweeten" the meat before marinading. The acidulation helps to break down the tough meat fibers from of chemically laden, stressed out pigs.


If the banana leaves are too much for you, I suppose one could substitute parchment paper though I have never tried it. Also, you can shape these into 1.5 inch balls (invest in a cookie scoop!) and make Thịt viên | meatballs. Easy peasy lemon squeezy. Boil in water until cooked through before adding to soups, noodle dishes etc. Freeze the extras.


Ingredients

(Makes 3 rolls)

1.5 tsp unrefined sea salt (Celtic/grey or Himalayan/pink)
1.5 tsp fresh ground organic black pepper
1 tbs organic coconut palm sugar
1 tbs baking soda
6 tbs Red Boat fish sauce

3 lbs sustainably raised pork country ribs (butt), cut into 1.5 inch squares

1-2 tbs of fish sauce
1-2 packages of frozen banana leaves, cleaned, blanched, and wiped dry
kitchen twine (each strand should be 4-5 lengths of the roll)

In a  bowl, mix all the marinade ingredients together. Toss the cubed meat with the  marinade. In the ideal world, marinade for 4 hours. 

Working with small batches, use a food processor or a very high powered blender to make a fine meat paste (approx 3 minutes of processing) and reserve in a large bowl. Add any leftover marinade juices and mix in. Work quickly to keep the paste cold. When it warms, the fat melts making it more difficult to roll.

Lay out the banana leaves on a tray or cutting board. You will need 2-3 layers of leaves. Use 1/3 of the meat paste and shape into a cylindrical roll. Use a silicone pastry brush and brush with fish sauce. Roll snugly in the banana leaves, adding more leaves to patch any tears. Fold down the ends and tie with twine using the roast method.

Steam in a pressure cooker for 40-60 minutes. Steam in a regular pot for 1.5 hours or boil for 40 minutes. (If you make smaller rolls, it'll need less cooking time.) The interior should be cooked through--that greige meatball color. Some pink is okay if you are using sustainably raised meat.

Slice as needed. Store uneaten roll whole in banana leaves in an airtight container in the fridge. Extra rolls can be frozen, banana leaves & all. Steam in the banana leaves to reheat.


Ăn Ngon Lành|Eat Delectably!


Tuesday, November 25, 2014

Cold & Flu Buster (folk remedy)

It's cold & flu season and in case you didn't know this about children--they are disease vectors. Moms don't get sick days so I can't afford to get sick. Since I don't use drugs, my arsenal of cold & flu remedies is essential; my three main tools are the lemon ginger infusion, the neti pot, and bone broth. After my 2 week writing binge for my guest lectures during which I neglected my family & household and stayed up late, I volunteered in my kid's class and of course, picked something up. I've been fighting it off for a week now but it's very mild because of the neti pot nasal saline rinse and this lemon ginger infusion.

I got this lemon ginger infusion folk remedy from my mother-in-law one winter while suffering a dreadful cold. It's super easy to make and has helped me get over sinus infections, colds, strep throat, all without the use of pharmaceuticals. It falls under thuốc nam which means folk remedies distinguished from thuốc bắc which means Chinese medicine. Raw honey hasn't been refined which means the healing properties have not been cooked out and the sugar has not been simplified to pure glucose.

An ayurvedic neti pot for sinus rinsing which is super effective in preventing, minimizing and clearing up nasal viruses & bacterial infections (i.e. sinus infections, colds & flus). As someone who has had near drowning encounters in the ocean, it didn't sound like something fun to me when I first heard about this, but I was won over because 1) you do not inhale the saline water (duh!); 2) you can breathe through your mouth at the same time as you are rinsing; and 3) it helped me with reducing my seasonal allergies (when I used to get them in my eating wheat & dairy days) and with shortening the length of illness from respiratory issues. The key is in getting the right proportion of un-iodized table salt to water (do NOT use sea salt!!! The minerals will irritate your sinuses) and the right water temperature (very important: use filtered water!!! you don't want to be shooting algae up into your sinuses. If you do not have access to filtered water, boil the water at least 5 minutes and allow to cool to the desired temperature). I use 1/4 tsp of salt to 1 cup of water which is enough for one nostril and the temp has to feel very warm but not too hot to my fingers.

On to the remedy. 

COLD & FLU REMEDY

You will need:

  • 2 quarts of filtered water
  • 1 organic lemon
  • 1 3-inch piece of organic ginger
  • organic raw honey or raw honey
  • optional sea salt (colored grey, pink, red, etc)
Fill up a pot with the water and get it started heating up. Wash & scrub the lemon to remove any dirt and residue. Slice it up and throw it in the pot of water. 

Remove as much ginger skin as possible, slice it up and toss in the pot.

Low boil for at least 10 minutes to extract all the Vitamin C and anti-inflammatory medicinal properties.

Discard the lemon; the ginger can be reused or not for another batch. Take a bite and see if it's still got some zing to it. Pour yourself a mugful and add honey to taste. My little twist on this remedy is rehydrating beverage or healthy "sports drink". (That's right. Gatorade is basically the same electrolytes as sea salt, citrus, and sweetener; make it yourself without the synthetic minerals, flavors and food coloring.) This is great for when you've got a fever or have been vomiting and need to restore your electrolyte/mineral balance. 

Drink as hot as possible for relief from respiratory illness. 


Saturday, June 14, 2014

Pasta Carbonara (GF/DF)

I improv'd this meal at 4 o'clock when faced with dinner time and no real plan and diminishing food stock in fridge.  I happened to have a half pound of Trader Joe's uncured, nitrate-free bacon ends & pieces from a while back that still smelled edible and a frozen brick of sustainably-raised ground beef as my base along with chopped kale that I had cooked for the morning's green smoothie.  I set the beef chub to defrost in a tub of water then pulled out my trusty America's Test Kitchen for the recipe instructions.  Pretty much only the ATK cookbooks (and the Asian ones) survived the GF/DF purge a few years back because they are hands down the best cookbooks ever.

I still had leftover raw macadamias in the pantry from when I made nut cheese for GF pizza and Faux Cheezy-cake. This recipe uses the faux cheese method that I discovered in The Dairy-Free & Gluten Free Kitchen.

Other ingredients that I sourced from TJ's besides the bacon: the pre-chopped organic kale, organic brown rice-quinoa pasta.  I abhor brown rice pasta, but the addition of quinoa makes it a lot more palatable.  TruRoots also makes a good brown rice-quinoa pasta that I've found at Costco.

Since the TJ's bacon is rather random pieces and a lot of fat, I added water as it was cooking to help render the fat without burning the bacon.  I started off with 1 cup of water, then as it evaporated added more water until the fat was more rendered into edible sized pieces, then I allowed it to brown on both sides.  This process left a lot to yummy bacon lard and a nice golden brown glaze on my All Clad skillet that I deglazed with balsamic vinegar since we didn't have any white wine on hand.

The timing on this matters.  The macadamia-egg mix should be tossed on to the hot pan (heat off) when you are ready to serve.  T & kid were on a walk visiting the neighboring mule & goats so I had to cover the pan at the third to last step and wait for them to get home.  I had the pan back on low heat with just the pasta, kale & beef, and when they got home, I tossed the macadamia nut mix on.

This is best served fresh.  This recipe serves 4-6.


Ingredients


  • 1/2 lb+ of uncured bacon
  • 1 lb of ground beef (anti-biotic free)
  • balsamic vinegar (in lieu of white wine)
  • grey sea salt (aka Celtic salt)
  • fresh ground organic grains of paradise (or black pepper)
  • 1/2 cup raw organic macadamias
  • 3 organic eggs
  • 1/2 tsp organic onion flakes or powder
  • 1/2 tsp organic minced garlic powder
  • 16 oz chopped cooked organic kale (steamed or boiled)
  • 1/2 package organic brown rice & quinoa pasta
  • optional organic chipotle powder

Soak the raw macadamias in enough water to cover.

Cook the kale by boiling or steaming it until cooked through for 10-15 minutes.

Make the pasta according to instructions.  Approx 8-10 minutes.  Drain and rinse with hot water.

Turn oven to 150 degrees and set your oven-proof serving bowl in the oven to warm.  Since I had a nice handmade Tunisian bowl that I was afraid of breaking, I left it at the lowest temperature setting and put the bowl in while the oven was still cold.  Once it heated to 150, I turned the oven off and led the door closed to retain heat.

Drain the macadamias of most of the water leaving around 1/4 cup of water.  Puree the macadamias with the eggs, garlic and onion and a spoonful of sea salt.

Fry the bacon in a skillet until browned.  Remove bacon and add ground beef, sea salt, pepper.  Brown it until cooked through.   Deglaze the pan with balsamic vinegar.  Cover with a lid and turn off the heat to retain the heat.

Add pasta and kale to the skillet.  Pour the macadamia mixture over and toss until well coated.  Cover with the lid.  

Using a towel or potholders, remove the bowl from the oven.  Pour the pasta into the bowl.  Top with crispy bacon and more pepper.  Toss and serve immediately.


Ăn Ngon Lành|Eat Delectably!

Sunday, June 1, 2014

xôi gạo nếp lứt nảy mầm | sprouted sticky brown rice


Xôi (aka sweet rice, sticky rice, glutinous rice) is typically a dish for special occasions and breakfast.  It can be eaten sweet or savory or sometimes both.  There are many, many variations.  For this recipe I will be giving two variations Xôi | sweet-salty with coconut milk and Xôi Cúc | sweet-savory with mung beans.


I choose to sprout the grains & beans because doings so unlocks the anti-nutrients; grains & beans are after all seeds that contain all the genetic potential of the plant.  Seeds have inherent self-defense in the form of anti-nutrients such as physic acid.  Sprouting germinate the transformation from seed to plant and makes it more digestible.  Start sprouting two days prior to the day you plan to  cook.  
Soaking the whole grain/legume in water helps to reconstitute the grain and reduces cooking time.
I discard any water used with the rice because of the issues with inorganic arsenic contamination.  I also use organic rice which has lower levels.

Using an unhulled or brown rice changes the texture of the xoi.  There is a slight crunchiness and integrity to the grain that one doesn't get with unhulled rice.  Xôi Cúc translates as chrysanthemum rice because if the bright yellow color of the hulled mung.  Leaving the hull on will change the color to a yellow-green.


Ingredients:

XÔI 
  • 2 cups brown glutinous rice
  • 1 cup coconut milk
  • coconut palm sugar
  • grey sea salt
XÔI CÚC
  • 2 cups organic brown glutinous rice
  • 2 cups unhulled organic mung beans
  • 2 cups water
  • 3 cloves garlic
  • 4 shallots
  • coconut oil or pasture-raised lard
  • black pepper
  • grey sea salt

Equipment:
Bowls for soaking/sprouting, immersion blender, skillet, steamer pot.

SPROUTING THE SEEDS 


TWO DAYS PRIOR
REGULAR XÔI 
Rinse the rice and then soak the rice in filtered water overnight in a dark place or covered with a dish towel.

XÔI CÚC
Rinse mung bean.  In a separate bowl, soak the mung beans in filtered water overnight in a dark place.

DAY BEFORE
REGULAR XÔI 
Drain the rice and discard the water.  Do not reuse the water .  Rinse and drain.  Leave in a dark place.

XÔI CÚC
Drain the mung beans (water can be composted).  Rinse and drain.  Leave in a dark place or covered with a  dish towel.  Once it sprouts a tail, move them into the fridge.

COOKING THE RICE & BEANS
REGULAR XÔI 
Put the rice in the steamer.  If your steamer has big holes, cover the pot with parchment paper or banana leaves with small holes poked into it to allow the steam to circulate.  Steam for 20 minutes then add coconut milk mixing well.  Steam for an additional 10 minutes until the brown rice grain has a slightly al dente texture with a soft interior.  Transfer to a serving bowl, add salt and sugar and mix well.

XÔI CÚC
Cook the mung beans and water in a regular pot for 5 min until just cooked. Drain them.

Fry the garlic and shallots in lard or oil for a few seconds until fragrant, then add the mung beans.  Add pepper and salt to taste.

Mix together the rice and mung beans and put them in the steamer.  If your steamer has big holes, cover the pot with parchment paper or banana leaves with small holes poked into it so the steam can circulate.  Steam for 30 minutes until until the brown rice grain has a slightly al dente texture with a soft interior.  

Monday, May 26, 2014

Sunny with a Chance of Sai Ua ໄສ້ອັ່ວ | Laotian sausages


Sai ua ໄສ້ອັ່ວ | Laotian sausages have been a bbq staple for us for many happy years and we've introduced it to our friends and family.  (I did a brisk interstate trade there for a while).  Sai ua are also common to Northern Thailand (since nation-state borders are an artificial capitalist construct and cut across language and cultures).  I am eternally grateful to Saysana for ordering this delicious dish at Champa Garden--and also for the gift of a nifty Laotian sticky rice steamer.  

A few years back, I convinced the owner of Vientiane Cafe to sell me the sausages frozen to grill at home and now they do a brisk sideline selling the sausages.  Since we moved to Fremont, we rarely hit up Vientiane anymore, and though Green Champa Garden makes it, it's a smaller portion and I react to the MSG besides.  You gotta get your sausage where you can.

I set myself the goal this year of using the slabs of pork belly from our annual pasture-raised organic hog buy.  I used one slab for making Bánh Chưng and I've been meaning to make sai ua with the rest.  If you must use conventionally-raised pork, my mom recommends soaking it with lemon juice and water overnight to "sweeten" the meat before marinading. The acidulation helps to break down the tough meat fibers from chemically laden, stressed out pigs.

The soft start to summer over Memorial Day Weekend provided the perfect opportunity to make some sai ua.   We kept the skin on which gave the sausage a great chewy/dense texture.  Since the pork belly is very fat-rich (and very healthy fat I might add), we supplemented the pork belly with some boneless pork shoulder roast from our local Whole Foods Market.  According to Phia Sing (b. 1898, d. 1967), Royal Cook in the Royal Palace at Luang Prabang, an ideal ratio would be 1:4 fat to meat; I got to 1:2 maybe 1:3 ratio and we were perfectly content with the result. 


I used Phia Sing's recipe as the basis and added other Southeast Asian flavors that I've tasted at Champa and Vientiane--lemongrass, lime leaf, galangal.  Galangal is a rhizome in the ginger family; it has a distinct zingy, pungent flavor almost mustardy/horseradish/wasabi-like.  If you cannot source galangal, omit it. I buy the biggest tuber I can find and then freeze whatever I don't use. Lime leaves also have a distinct taste without substitute.  If you cannot source them from a Southeast Asian market, you can occasionally find them dried in the spice aisle.  Lucky for me, my MIL has a makrut lime tree.  I harvest a bundle of leaves, wash & dry, and then freeze them.  They keep well in the freezer (actually all the spices used in this recipe store well in the freezer).  I completely forgot about the cilantro so it's not pictured but you should add it.  Thai bird's eye chile peppers are the preferred chile to use; spiciness can vary by pod so you can pre-taste a chile and judge how many you'll need from there.  Habañero is also another fine substitute, use sparingly.  I think I used serranos (I always forget to label things I throw in the freezer and then am annoyed at myself).  Use gloves when chopping any chiles and handling the spiced ground meat.  I have had Terrible, Horrible, No Good, Very Bad experiences involving habañeros and contact lenses.  Spare yourself the agony.  I always make a separate no-spice version because my daughter doesn't eat spicy.  You'll want to process that first before adding the chiles.

I happen to have a meat grinder because I raw feed my critters (benefits: optimal health, sleek bodies, silky fur, low odor stools, no parasites) and I used to make my own grind pre-kid.  The Northern Industrial meat grinder can take on chicken bones for whole prey feeding.  If you don't have a meat grinder, you can use a food processor though be sure to keep the grind coarse.  Though I do have a sausage stuffing attachment, I didn't bother to source casings from organic hog or not, so we ended up making sausage sliders.  I was going to wrap them in blanched banana leaves for grilling, but then it was faster to make patties than wrap 5 dozen links.  If you don't have equipment, you can use the old school method of chopping the meat into ever finer bits (as instructed in Phia Sing's recipe).   If you are into ancestral food ways, you would grind the spices in a mortar and pestle.  I don't know the science of why mortar & pestled food tastes better, but it just does.  Though I have a bit of a mortar and pestle collection going on (used to be five, I've downsized to the two my parents gave me--a volcanic rock molcajete and a Costa Rican mahogany one), I was pressed for time so used a food processor. I had a fine sous chef for this recipe run which cut my production time (wish I took a pix!  but my hands were busybusybusy); he cut the meats into smaller chunks, helped make patties and washed up a little bit.  It always takes time to establish a rhythm and harmony with a kitchen partner.  We've been together for over 15 years, married for 8, and partner well in the kitchen now.   I cannot even tell you how excited I am about this recipe!  It would be as if it rained breakfast food in a marvelous foodtopia.


Cloudy With A Chance Of Meatballs

Sai Ua ໄສ້ອັ່ວ | Laotian sausages

Makes 5 dozen two oz. patties

Ingredients:

  • 3.5 - 4 lbs of pork belly including skin
  • 3 lbs of pork shoulder
  • 4 shallots
  • 1/2 garlic head
  • 4 lemongrass stalks
  • 4 inches of galangal 
  • 2 handfuls of makrut lime leaves
  • 1 bunch of cilantro
  • 3 handfuls of celtic/grey salt 
  • 1/2 cup+ of Red Boat fish sauce
  • chiles to taste


Spice paste

Prep the spices for grinding or processing. Chop off the top third of the lemon grass and the base of the bulb and compost.  Using the dull edge of the knife, bruise the lemongrass to release the juices.  Cut into three pieces lengthwise. Peel garlic.  You can do the fancy chef 10 second way or use the flat side of a knife to smash the cloves and then remove the skin. Skin the galangal and cut into smaller chunks. Throw all the spices and salt into the food processor.  I found I didn't need additional liquid, but if you do need some to help with the processing, add fish sauce.


Sausage

Cut the pork belly into thick strips if you are using a grinder, cubes if you are using a food processor.  Cube the pork shoulder. Mix together the pork belly slices pork shoulder cubes and the spice paste.  Add more fish sauce.  In the ideal world, you would marinade this at least 2 hours and up to one day.  I was in a bit of a hurry so I didn't marinade at all.

Meat Grinder: Use a coarse grinding plate.  Put a mix of belly/meat into the hopper of the grinder.  Reserve a high fat/skin piece of belly for to feed into the grinder last.  This clears out all the meat bits and with a grinder there is a very small amount of wastage that doesn't grind, so I'd rather waste fat & skin then meat.  Normally, I'd feed the leftover bit to the dog or cat, but since it had chile, I did not and had to throw it out.  (I hate wasting like that! I suppose I could have chopped it and added it, but time was a factor.)

Food processor: Fill the bowl with cubed belly & meat and pulse until coarsely ground. Once it's all ground, give it another mix to blend into the fat/skin, meat, and spices.  Add additional fish sauce at this time. Give the sausage a taste test at this time following these instructions from Phia Sing:
Take a very small sample portion of the mixture, wrap it in pieces of banana leaf and grill it until cooked. Taste it and check the saltiness. (If this test is satisfactory you can proceed to make the sausages. If the taste of the grilled sample is not right, adjust the seasoning.)
Line a roasting pan with parchment paper or banana leaves.  Make balls and form into patties.  I have a 2 oz cookie scoop that my sister gifted me that I use for baking (it's the exact amount of batter for a cupcake) and meat balling because it saves me time & energy.  If you are storing these for later, separate the layers with wax paper, parchment paper or banana leaves. Broil for 10-15 minutes or grill. Serve with brown sticky rice (recipe forthcoming).


Ăn Ngon Lành|Eat Delectably!