Tuesday, October 22, 2013

Sticky brown rice mochi recipe testing

mo·chi

/ˈmōCHē/

a short-grained, sweet, glutinous rice cake with a high starch content, used in Japanese cooking. 

While mochi appears to have been been mainstreamed as a delectable pastel ice cream treat to be had at a sushi restaurant, as a foodway it is actually widespread in Asia with different vocabulary natch, as a sweet morsel filled with beans or seeds and usually connected with traditional celebrations.  Mochi is made from glutinous or sticky rice and symbolizes "good times" in a nutshell.  My MIL makes chè trôi nước--a sweet mung bean stuffed mochi served in ginger syrup for birthdays.  That's party mochi; I have in mind a plain, everyday, savory mochi.


One of my all-time favorite snacks is bánh dầy chả lụa--little rice cakes shaped as the sky according to Viet legend brushed in oil and sandwiched around steamed silky pork sausage and wrapped in banana leaves.  Whenever we were near a Viet deli/bakery, I always grabbed 1-2 for the road.  Since I've stopped eating MSG, I've stopped eating at Vietnamese food places, because inevitably there is MSG in everything especially chả lụa.  I haven't taken my MIL's offer up to teach me how to make chả lụa yet.  Though with a quarter hog in my freezer, I think I ought to calendar that in.

So I was a kid's birthday party this weekend that had the traditional Korean tteok | mochi which was made with brown sticky rice and coated with brown rice powder, some with a sweet sesame seed center.  And I happily ate like a half-dozen after reading the ingredients and making an allowance for sugar (in any case, this was tuned to Asian tastebuds and was not very sweet at all).  My daughter VL got a few too since she couldn't partake of birthday cake.  We took some of the leftovers home and it struck me that it would make a great lunch for VL for school especially since she starts extended kindergarten hours next week.  I scoured the internet which had lots of white sticky rice recipes. lots of traditionally-made-by-pounding recipes, and surprisingly, a lot of microwave recipes.  I finally found this wholesome, macrobiotic brown rice mochi recipe by Jill Ettinger (Organic Authority) which is food processed, steamed, and baked.

So, embarking on my maiden voyage into mochi making.  Here are my testing notes & tweaks. 

Soak the dry rice in water for several hours or overnight. Drain off excess water.
Captain's log.  Stardate 22.10.2013.  I soaked the organic sweet brown rice that I sourced from Azure Standard overnight in my sprout jar.  I think I'll try sprouting the sticky rice grains at some point to maximize the nutrient content (remove phytic acid & arsenic contamination), but this requires planning 2-3 days in advance...


In a strong food processor or blender, process the rice until it makes a smooth, creamy paste.
Mochi dough
Maybe my Kitchenaid is not high powered enough or I drained the rice of too much water or the recipe forgot water.  All I got was crumbly.  So I slowly added 2 tbs of water and it promptly balled up and was more doughlike than paste.  Then I had to take a break and go pick up my daughter from school.  When I came back, I remembered the salt (which is a forgotten step on the recipe) and added it and it all crumbled apart again (probably the water was absorbed into the rice and it dried out).  So I added another 2 tbs of water to get it to ball up.  I suppose I could have added more water to get it to paste consistency, but I liked the easier removal and clean up of the dough.  Sticky rice paste on blades is a P.I.T.A.  But thick dough means a denser mochi so I may try more water next time to achieve a looser consistency and allow the dough time to rest and soak up the moisture.  I'll have to experiment more and see...
Pour the mixture into a bowl or small pot you can steam with in a double boiler (you can also use a pressure cooker for about ten minutes). The rice should steam about 30 minutes or until the mixture gets glutinous and sticky. It should also appear somewhat glossy.
Steamed mochi dough
I started the water boiling in my pressure cooker with the rack and steamer tray inside while I scraped (not poured) the dough and crumbs into a round pyrex container powder-coated with generous amounts of tapioca starch.  To smooth it out, I lightly dusted my hands and the dough with starch to prevent sticking. The starching is where Jill's mochi recipe departs from bánh giầy which is formed into balls, oiled, and steamed on little individual squares of oiled banana leaves.

I set the pyrex in the pressure cooker which was boiling by this time and steamed for 10 minutes.  When the timer went off, I released the steam and voila.  I love my pressure cooker!  Mochi in 20 minutes from grinding to steaming.  The mochi is ready to eat at this point IMO with powdering or oiling.
On a tray dusted with the starch, pour the hot mochi mixture as evenly as possible, about ½ inch in thickness. Let cool before putting in the refrigerator for at least two hours. If you want to make round mochi, you'll need to work with the very sticky dough to form the balls, which is time consuming and worth mentioning again: very sticky.
Mochi ready to bake
This is an extra step compared to bánh giầy, but I decided to give it a go and see what happens.  I heated up my oven and since there was a pizza stone inside it from our recent pizza night with Pamela's GF mix (found at a steal $2 at GrocOut), I decided to bake on it with parchment paper rather then swap out.  I moved the dough over to a powdered 7.5 x 5.5 " pyrex container.  It's an extra step and extra dish to wash, but the round pyrex ends up moistened from the steam and not useful for this next task since I wanted even squares.  I  coated a butter knife with starch to make the cutting easier.  Then lifted the squares out and baked them on the aforementioned pizza stone & parchment paper


Puffed up baked mochi!
Mochi "beignet"!
The extra application of dry heat makes the mochi puff up and the outside crisp.  They resembled nothing so much as mochi beignets though the taste is gooey rice goodness!

We didn't have anything but deli roast beef on hand so that's how we did.  We found the mochi a bit too plain so I'm tweaked my amounts to up the gray sea salt (since it is milder than table salt).

I'll work on a  modified bánh dầy recipe forthcoming...


Ăn Ngon Lành|Eat Delectably!

Baked mochi ready to eat
This little piggy had baked mochi & roast beef.  Nyum!

Thursday, October 17, 2013

Leilani’s Rustic Almond Dipping Sauce


Leilani’s Rustic Almond Dipping Sauce

Makes 10 oz of sauce

Well after 10 years, I've finally made a new innovation with my sauce.  And my most important critic-- my 5.5 yr old daughter loves it!  The reason for this innovation is necessity.  My normal go-to source for almond butter (Trader Joe's) has been having a nation-wide shortage for this whole year.  So when I decided to whip up some gỏi cuốn | spring rolls for lunch since we had some shredded chicken on hand and making any carbs/starches like rice or sweet potato would take too long, I had to use what we had in the pantry--whole roasted almonds.  I like the rustic flavor & texture achieved by using whole almonds; it's considerably paler than the almond butter sauces I've made in the past since I am not using molasses in this recipe since I like to avoid cane-based sugars which spike my blood sugar; instead I'm using organic medjool dates that I picked up from Whole Foods recently. 
And it's not as creamy as processed almond butter.  It reminds me more of the Buddhist vegetarian sauces made with mung beans.  Best of all, I don't have to worry about the industrial processing of almond butter and the allowable rodent content.  Next, I'll try raw & soaked almonds to boost the nutritional value or I might try raw, soaked cashews since I have those in my pantry already (to make dookies).

Since my daughter doesn't yet like spicy, I leave the chile paste on the side and reduce the garlic.  While fresh garlic tastes better, I buy organic minced garlic by the pound from Frontier Coop because garlic sprouts faster than I can use it; conventional garlic is bleached and nowadays imported from China; organic garlic is pricey and we haven't gotten around to growing our own yet.  If you use fresh garlic, 1/2 a clove ought to suffice unless you like it more pungent.
  • 1/2 tsp minced organic dried garlic
  • 3 organic fresh medjool dates, pitted* or 1 tbs fruit syrup
  • 1/2 c. roasted, unsalted almonds
  • juice from 1/4 lime
  • 1/2 tsp grey sea salt
  • water
  • chili garlic sauce or fresh diced chilies to taste
In a food processor combine all the ingredients except the chile.  Add enough water until the consistency is loose, but not runny.  Add more sea salt if needed.

Serve the chile on the side so everyone can customize their Scoville factor.

Serve with gỏi cuốn or over warm noodles & protein (Bún).

*3/1/2014 I've recently watched Dr. Robert Lustig's TED talk where he lists the 56 names of sugar.  Date sugar was listed so I am now giving a lower glycemic option and in considering the sugar content of fruit, I've also removed dried figs and dried dates in favor of a lower glycemic fruit syrup.  

Original almond sauce recipe here.
Gỏi cuốn | spring rolls recipe here.

Leave a comment and let me know how you think it compares.


Ăn Ngon Lành|Eat Delectably!


Thursday, October 3, 2013

Fish Sauce Taste Test


Well, I am finally getting around to revisiting my infamous fish sauce taste test (so wrong, it's right) that led me to the definitive conclusion about which fish sauce rocks.  Here in all its glory is the taste test proceedings.

* * * * * *

MY HOT DATE NIGHT: Nước Mắm Tasting. Rrrrao! 

Me and T. originally conducted this taste test on Dec 30, 2011.  

These were all the nước mấm in our cupboard at the time.  Our baseline is no wheat/gluten or chemicals/preservatives which eliminates a lot of the brands one normally sees in the Asian markets.  We stopped eating the popular Ba Con Cua when they started adding hydrolyzed wheat protein (aka MSG and gluten) into the ingredients many years ago.
 

We tried to avoid using the word SALTY or FISHY to describe any of them since that is a no-duh description.

Mot trăm phần trăm!|Bottoms up!

PARTIAL TRANSCRIPT

Lani: I'm going to get diarrhea from this. 
T: You don't need to take a spoonful, babe.
(2 tastings later)
Lani: Aw man, I am so thirsty.
(4 tastings later)

Lani: You know, I really only need a drop. 

T: Hmm. . .
(some tastings later) 

T: Dammit, it all tastes the same now. 

TASTING NOTES

Squid--Aggressively salty. Fruity overly sweet/sugary.  Added sugar did not balance it out. 
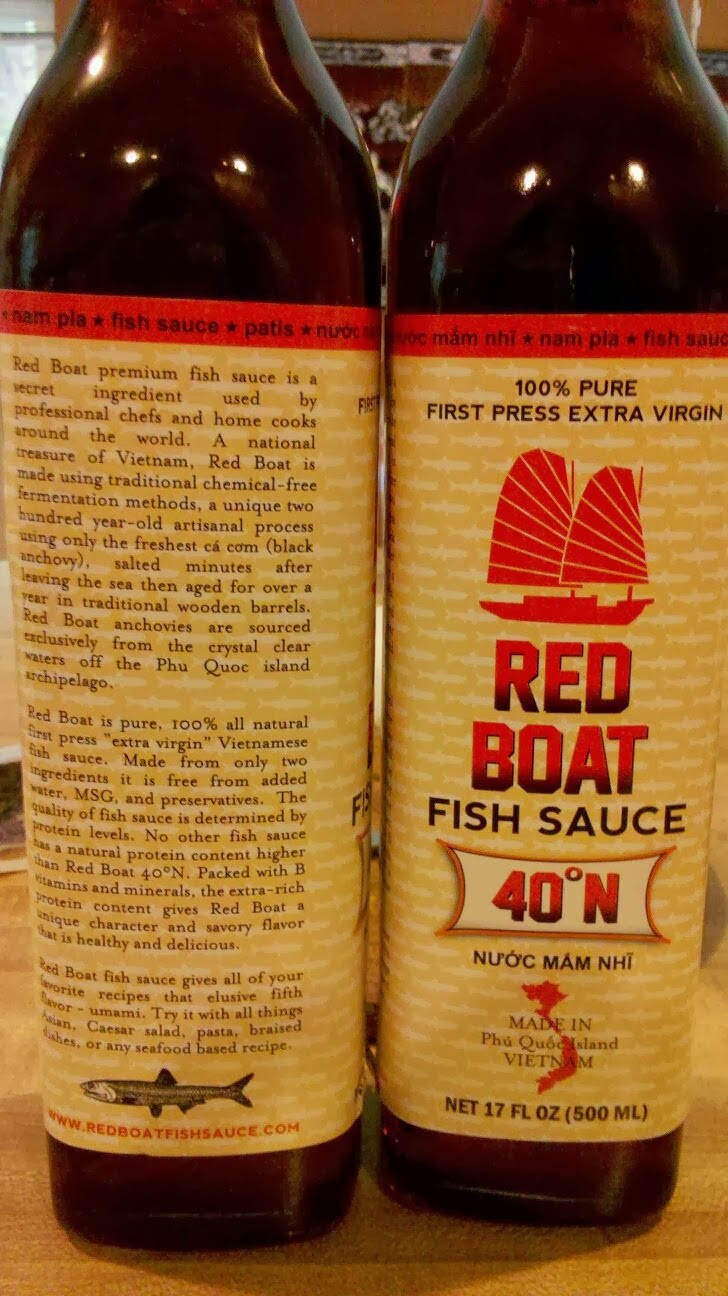
Red Boat--Fishy with a lingering flavor. Sweet.
Lobster/Nha Trang--Light MSG-like/chemically. like old crystallized fish sauce. 
Phú Quốc--Tastes like reconstituted crystallized fish sauce. 

Note: Some of the comparison is apples to oranges. Red Boat & Phú Quốc are both nước mắm nhĩ [extra virgin] while Squid and Lobster/Nha Trang are not so the latter could be the result of multiple pressings or pasteurized/homogenized.

Ingredient note: Squid and Phú Quốc add sugar while Lobster and Phú Quốc add water.  Red Boat is pure anchovy & salt.
 

  * * * * * * * *

WINNER: RED BOAT

Although fishy would seem to be a given description of any fish sauce, surprisingly enough, this was the only one of all four where that word applied. It was distinctly fishy and oily, lingering on the palate in a good way.  It has that great umami flavor that makes Caesar dressing and pasta puttanesca my faves.  Though there was no sugar in the ingredients, it was still sweet, making it the most complex flavor.

  * * * * * * * *

OVERALL RANKINGS

#1 Red Boat
#2 Lobster/Nha Trang (Old reconstituted crystallized fish sauce. Use for cooking when nuance is not important.)
#3 Two buck Phú Quốc (Nước mắm pha only, no need to add much sugar)
#4 Squid (only to be bought in the event of apocalypse)


Now our taste test is concluded and we have agreed that the clever artisanal language and the EVOO bottle packaging markup is indeed worth the $8-10, we are extremely dehydrated and need a listerine. Badly. 

More musings on Red Boat here.


Ăn Ngon Lành|Eat Delectably!

Wednesday, October 2, 2013

Hủ Tiếu Bà Năm Sa Đéc | Mrs. Five's Noodle Dish from Sa Dec Recipe

Pork Hủ Tiếu Bà Năm Sà Đẹc no broth
This noodle dish is one of my favorite dishes which harkens from vùng Cửu Long the land of the 9 dragons (aka Mekong Delta) of Hokkien-Khmer origin.  It is a specialty attributed to Bà Năm Sa Đéc|Mrs. Five of Sa Dec.  Who this mythical Bà Năm|Mrs. Five  is, I don't know; it's very common in the South to call people by their birth order rather than their personal/intimate name and when they're married by their spouse's birth order depending on which one you are related to or know (VN is a relational language so the pronouns are not fixed but based on one's relationship).

When I was in my first trimester with my daughter and nothing appealed to me, my parents made Hủ Tiếu Bà Năm Sà Đẹc and my appetite restored.  My stepdad is from the Mekong and was raised in a Buddhist monastery where he learned to cook as a trade.  This is the recipe my parents taught me.  The glass noodles are served with ground pork in a tomato paste base with shrimp and served with a side of pork broth, though chicken or beef broth could be substituted. This is my quickie version without the battered shrimp cakes.  I made two versions in the last few months, one with chicken legs since I was out of my organic hog share and one when I picked up my organic, pasture raised hog share for the year.  I added zucchini to one because we just harvested it from the garden and I'm always looking to boost the veggie content.  Also, my lifelong allergy to onions was recently cured (!!!) by my chiropractor (not just for bad backs, yo!), so onions are back in my pantry for the first time since I moved away from home and started cooking for myself (almost two decades).

Hủ Tiếu Bà Năm Sa Đéc

Ingredients
  • 1 lb of sustainably-raised ground pork or 3 chicken leg quarters, deboned & ground
  • 1/2 cup of dried shrimp soaked in hot water for 20 minutes and minced in food processor
  • 3 tbs of tomato paste
  • 1 shallot, minced (or substitute with 1/2 sweet onion)
  • 2 garlic cloves, minced
  • Black pepper
  • Red Boat fish sauce
  • Organic greens of choice
  • Zucchini, julienned (optionally added to stir fry or to broth)
  • Tiger shrimp, squid or other seafood (frozen without preservatives)
  • Korean sweet potato noodles (dang myun)
  • pork broth (can substitute chicken or beef broth) served as a side
  • chopped green onions for garnish
Directions
Boil water and make noodles according to directions.  Usually about 10 minutes.  Warm up your broth of choice.

Blend ground meat and shrimp in a food processor until just mixed.


Stir fry ground meat & shrimp mixture, add shallots & garlic, several dashes of fish sauce and pepper.  Cook for until the meat starts to brown but is still pink.  Add tomato paste and saute for a few minutes until cooked.  Remove from heat.

If you wanted additional seafood, poach them in the broth at this time.

Serve the glass noodles with the pork-tomato paste, any seafood, and greens and a side of broth garnished with chopped green onions.  The broth can be used to moisten the noodles to taste/consistency you prefer and/or sipped during the meal.


Ăn Ngon Lành|Eat Delectably!