Showing posts with label vegan. Show all posts

Wednesday, May 21, 2014

Faux Cheezy-cake (Gluten-Free, Dairy-Free, Sugar-Free, vegan, paleo, raw, full fat)


Go Shorty! It's my husband's birthday, and I'm making him his favorite dessert cuz it's his birthday—it's cheesecake.  (Yes, in my mind that everything preceding the em dash really did come out as a rap.)  Only, it's whole food, dairy-free, gluten-free, sugar-free, no bake, mostly raw, vegan, paleo, full fat, and all kinds of yummy.  

I'm calling it Faux Cheezy-cake! 
That's the anthem, Get your damn hands up!
Good times.
lilikoi & apple caramel faux cheezy-cupcakes
Everything looks better staged on our new table!
Industrial rustic chic.
This is another case of not being able to find the exact recipe I want/need to make my heart's desire.  So I mashed up three very different recipes from three disparate though intersecting nutri-diets—Weston Price + Paleo + Raw/Vegan ==> mine own Faux Cheezy-cake version.  (I do want to give the sour coconut cream one a go though.  Probiotics!)

This is also a case of lack of menu planning and some pantry raiding though I did run out to Whole Foods to get raw macadamias (forgetting anything else besides).  For the crust, I used 1 cup soaked & sprouted pesticide-free almonds (soaked overnight and allowed to dry then rinsed daily for 2 days), 1 cup lightly salted & roasted cashews because that is what I had on hand though I would have preferred walnuts or pecans.   Actually for this crust recipe, any nuts will do—May I return to the beginning, The light is dimming, and the dream is too, The world and I, we are still waiting, Still hesitating, Any dream nut will do—though the nutritional optimum would be soaked/sprouted, raw nuts to reduce the anti-nutrients and encourage sprouting.  Funnily enough, the crust is pretty much the same recipe as what we call "dookies" in our household which are a healtheir/less processed version of Lara bars (aka pemmican/biltong/iron rations) which we started eating when we cut processed foods, wheat, dairy, sugar from our diets then had to give up when they (Lara bars) got bought out and started adding sweeteners and junk (brown rice syrup triggers major blood sugar/intolerant reactions in me).

I've recently learned the difference between true or ceylon cinnamon and cassia (commonly called saigon cinnamon); here, I'm using fair trade, organic, true ceylon cinnamon and it is zingy as all get out!  (I'm finding Indian spices to be zingier than the cultivars from Southeast Asia—hey, that Spice Trade was for a reason, eh?).  You can substitute cassia/saigon cinnamon and I will still be your friend.


For the filling, soaked raw nuts are the best.  No roasted nuts, because you will get nut butter, not the creamy almost milky flavor ya need for faux cheese.  I like raw macadamias because they only need to be soaked a few hours.  Raw cashews can be substituted however they take 1-2 days of soaking.


If necessary, you can substitute 1 tbs of gelatin (which is made from animal collagen and therefore not vegan, if you care) for the agar (made from seaweed) or leave out.  The agar gelatinizes at around room temperature so it helps keep structure at temps where coconut oil would melt.  Gelatin requires a lower temperature (i.e. refrigeration) to set.  You can also omit agar/gelatin, but keep it refrigerated.  Coconut oil has a melting point of 78 degrees F so it'll be very soft at room temperature (cf. butter & cream cheese have a melting point of 82.4 F.)

And because I'm lazy to make a new topping, I used what I had on hand--cocoa hazelnut spread (aka nutella-the-good-parts-version, as you wish!  Recipe forthcoming), my special  lilikoi butter and apple juice caramel.  Any fruit preserves or fresh fruit will do. 

Just a note that going sugar free over a long period of time resets one's sweet tolerance.  This is a very low sweet dessert which is perfect for me & mine.  Not that my beloveds have a choice.


Faux Cheezy-cake

Makes 13 cupcakes or one 8-inch pie

CRUST
  • 2 cups nuts (unsalted best)
  • 1/2 cup organic unsulfured apricots
  • 1 tbs organic extra virgin coconut oil
  • Pinch of himalayan sea salt
  • 1/2 t ceylon cinnamon
FILLING
Agar powder
Can call all you want but there's no one home

And you're not gonna reach my telephone

Out in the club and I'm sippin' that bub
And you're not gonna reach my telephone
 

  • 2 cups raw macadamia nuts, soaked 2-4 hours
  • 3/4 cup melted organic extra virgin coconut oil
  • 1/4 cup apricot syrup
  • 2 tsp vanilla
  • 6 tbsp lemon juice (~ 1 lemon)
  • 1 tsp agar powder dissolved in 1/4 c very very hot water
  • pinch himalayan salt
TOPPING OPTIONS
If you are using any refrigerated toppings, take it out of the fridge to let it come to room temperature.


CRUST
Line a 8-inch springform pan with parchment paper OR use a cupcake pan lined with cupcake liners.

Pulverize all the ingredients in a food processor until a coarse meal is formed.  Press into the pan firmly until you have 1/4 inch depth cupcakes or 1/3-1/2 inch depth for springform.

Leftover crust mix can be shaped into balls or bars and stored in the fridge and eaten as you would eat granola bars/energy bars.  (Dookies!)

FILLING
Blend all the ingredients in a food processor or a blender.  
Use a 2 oz cookie scoop to scoop it into the cupcake liners while it's still warm.  


TOPPING
Use room temperature topping if you have something that is unmalleable at refrigerated temperatures.  Coat the Faux Cheezy-cake or Faux Cheezy-cupcakes. 

If you are using fresh fruit and want a glee to hold the fruit: mix 1-2 tsp agar powder in boiling hot water until dissolved.  Add any sweetener.  Layer the cake with the fruit then pour the agar syrup on top while it's still very warm.  

Refrigerate for 1 hour.


Ăn Ngon Lành|Eat Delectably!

Faux Cheezy-cake with apricot syrup

Happy birthday Trung (and Đàn Tâm too)!

Friday, May 2, 2014

Vegan Lilikoi Butter (GF/DF/SF)

Our phamily matriarch Aunty Len goes back to Hilo every year or so to visit her in-laws.  She always comes back with the best treats--homemade pickled baby mangoes, chocolate macadamia nuts (macadamias are my favorite thing ever!), and lilikoi (passionfruit) for making butter.  My daughter VL loveloveloves aunty Len's lilikoi butter.  And then one day, I googled the recipe and realized it has dairy (1/2 lb of butter!) and refined sugar!  Sometimes ignorance is bliss.  Sigh.

So I am finally getting around to making a dairy-free, refined sugar-free lilikoi butter.  I used this vegan lilikoi butter recipe but have substituted healthier, real food choices like unrefined sweetener and coconut cream concentrate.  (I have a reaction to agave in all its forms likely do to chemical contamination in the production which means alas, tequila is no longer my friend.  And agave syrup is not without its criticisms besides.)

I just bought the Tropical Traditions Organic Coconut Cream Concentrate and I'm excited to give it a try.  Previously Artisana Organic Coconut Butter has been a staple in our house.  You can google all the benefits of coconut, but from my experience, having a spoonful (or more) of coconut butter a day helped to restore my brain function, stabilize my blood sugar, and boosted my immune system.  I've just given the TT CCC a taste and it's more viscous, smoother and lighter than the Artisana.  I'm presuming the difference is the production; TT is produced in the Philippines from perhaps fresh or fresher, whole coconut.  Artisana is produced in Oakland I presume from dried whole coconut as it is a little denser (not a bad thing per se).  Both are delicious!

We don't eat very much GF bread, but I will have to crank out some paleo bread for the occasion.  


Previously I've made DF/SF apple juice caramel (essentially apple butter with a sexier name) and I forgot how long it takes to reduce.  I'm inclined against the lemon called for in the original recipe.  Usually it is added to fruit preserves to retain the color against oxidation.  Passionfruit is already so tart though that it pushes it even tarter which requires more sweetener to balance and still the tart lingers on your palate afterwards.  I've taken it out of the recipe but in case you are concerned about the aesthetics, add 1-2 squeezes of lemon.

Generally, sugar is added to the reduction process to carmelize and ergo thicken the preserves.  If you are using raw honey, put it after the reduction to retain all the nutrients and keep it from being cooked.  Apricot syrup can be added to the reduction as can palm sugar.  We are fairly low sweet so you should taste and add more/less sweetener to your taste.

I'm very pleased with the way this came out, especially the texture of the TT CCC which is very creamy & silky.  It's almost custard-like in consistency.  In the future, I'm thinking this calls for a classic Hawaiian POG variation--passion fruit, orange and guava.

This recipe has also been posted on Tropical Traditions website.


Vegan Lilikoi Butter (GF/DF/SF)

makes 1.5 cups

Ingredients:

  • 18 oz lilikoi pulp*
  • 1 cup Tropical Traditions Coconut Cream Concentrate (or substitute coconut butter)
  • 6+ tbsp raw honey, apricot syrup, or coconut/palm sugar*
Simmer the lilikoi and apricot syrup or coconut/palm sugar in a small saucepan at the lowest heat setting until it is reduced by one-third to one-half (about 60 minutes depending on how hot your burner is).  Turn off the burner.  (A low boil would speed things up but I prefer a slow cook method.  You could also use a slow cooker to achieve the same purpose, but mine is clay and absorbs flavors so its savory smelling).

Stir in the CoCo Cream until dissolved.  If the CCC is solidified, dip a metal 1/4 cup measure into hot water and then scoop.  If using raw honey, add and mix.

Pour into sterilized half-pint jars.  Refrigerate one jar to eat right away.  Can the rest for later using the water bath method or freeze it.

Best served at room temperature as the coconut cream will solidify in the fridge.


* I found this in the freezer section of Mi Pueblo; more likely to be found in Latino-Carribean markets or Japanese-Hawaiian markets.  Give the package a quick rinse before opening to remove any residue, dirt, etc.


Ăn Ngon Lành|Eat Delectably!


Thursday, April 17, 2014

Sprouted hummus recipe

[Caveat: Not a Southeast Asian recipe]  Like many urban West Coast folks, I love hummus.  Hummus became my go-to snack three years ago when I was trying to stabilize my blood sugar.  I found that store bought hummus (even the expensive artisanal, locally made hummus I got from Whole Foods Market) is too tart for my tastes from the efforts to preserve it with lemon juice or citric acid (which is not derived from citrus but is a chemically extracted corn product that contains free glutamates).  So I started making my own.  At first, I used tahini, but it required going to a Middle Eastern market not typically on my usual grocery run.  Since I had limited energy, I bought sesame seeds.*  It's not that much more work and it's cheaper.  I use organic unhulled sesame seeds which have a slightly bitter taste although my picky kid doesn't notice.  If you don't like that, you can try sprouting or toasting the unhulled seeds (I've never tried) or using hulled/white sesame seeds.

  • 1 cup of garbanzos (aka chickpeas) soaked & sprouted or 1 can of organic garbanzo beans, drained & rinsed
  • optional 1 inch of kombu or 1 tsp kombu
  • 1 cup of unhulled sesame seeds or tahini/sesame paste.
  • 1/2 cup or so of real olive oil (I use MoonShadow Grove Mission Estate Certified organic EVOO)
  • 1 clove of garlic if you like it spicier, I use 1/2 tsp of dried garlic b/c my kid is sensitive.
  • 1/2 to whole lemon juiced (to taste)
  • grey or celtic sea salt to taste
  • optional paprika
  •  1/2 to 1 cup of water
  • optional pitted olives


Soak garbanzos overnight in filtered water.  Drain and use the runoff water for your garden.  Leave in bowl or colander.  Rinse and drain daily until it sprouts.  It should sprout by day 3.  Cook garbanzos.  I put it in a pressure cooker for 10-15 minutes with 4 cups of water with the kombu (helps to breakdown the indigestible carbs that make us gassy) and let it naturally depressurize.   If you don't have a pressure cooker, you can boil them in 5 cups of water and kombu for 3 hours.

Add all the ingredients except for olives to a food process and pulverize until creamy.  Add water until the consistency is right for you.  Add olives and pulse until minced.

Makes about 2.5-3 cups.


Ăn Ngon Lành|Eat Delectably!

*You have to have a food processor or powerful blender to puree the sesame seeds. 

Friday, February 28, 2014

Leilani’s Original Almond Dipping Sauce Recipe

This is a bonus recipe that accompanies my Goi Cuon recipe.

Leilani’s Almond Dipping Sauce

Makes almost 2 cups of sauce

This is my very own recipe that I've been using for over 10 years!  It's based on my mom's peanut dipping sauce which consists of chunky peanut butter, hoison sauce, lime, garlic, chile & water.  My secret ingredient is swapping almond butter instead of peanut butter.  This is inspired by my mom's use of slivered garlicky almonds or crushed macadamias (really whatever she has on hand) as a garnish on lots of different dishes that call for crushed peanuts.  Also I eliminate the hoison sauce which is really just wheat, starch/thickener, color/caramel, and MSG, and instead use molasses instead which is a nutrient-rich sweetener.  If you cannot tolerate any cane sugar, try using organic dried mission figs or dates and use an immersion blender or food processor to mix it.  The measurements are rough estimates of what you will need. Adjust according to your taste.


Ingredients:

  • 3 cloves garlic, minced
  • 3-6 dried organic unsulfured apricots or prunes or 3 tbs fruit syrup*
  • 1 c. crunchy or creamy almond butter
  • 2-3 teaspoons chili garlic sauce or fresh diced chilies to taste
  • juice from ½ lime
  • 1 ounce sliced or minced almonds
  • fresh coconut juice (or water)

In a small bowl, mix molasses 6 tablespoons almond butter, chili, lime and garlic. And water until the consistency resembles yogurt. Stir until almond butter is dissolved. Add additional almond butter and water until desired thickness is obtained. Adjust seasonings to taste. Garnish sauce with chopped almonds.


We eat this with our spring rolls and with noodles.


*3/1/2014 This is a substitute for hoison sauce.  I've recently watched Dr. Robert Lustig's TED talk where he lists the 56 names of sugar.  Blackstrap molasses was listed so I am now removing that from my recipe and in considering the sugar content of fruit, I've also removed dried figs and dates as alternatives.


Try my new recipe for making almond sauce:

Leilani’s Rustic Almond Dipping Sauce


Ăn Ngon Lành|Eat Delectably!


Friday, January 24, 2014

Chè bắp hột ngăm vôi | Nixtamal & tapioca pudding

Native corn harvest
What follows is a recipe for chè bắp | a sweet corn pudding made with tapioca pearls and coconut milk.  In order to make this a more nutritious dish, I will use corn kernels made from organic, heirloom native corn grown in my front yard and nixtamalized (alkalinized to be digestible and maximize its nutrients, very similar to hominy).  I hardly know how to write this recipe without getting into childhood memories, cultural foodways, and contemporary life.  So here goes:


Maize Foodways


While in current times, corn is so ubiquitous it can be invisible in American foods (about which Michael Pollan has tried to raise awareness), and worldwide, corn is one of the top 3 cereals/grains produced, its globalization, genetic modification, and industrial agricultural practices have combined to make corn a sugar-dense, nutritionally empty frankenfood.  But rather than dismiss corn altogether, it behooves us to remember its history and cultural practices in its consumption.  Before the current popularity of quinoa, chia, goji, maize was one of the original globalized "superfoods."  Cultivated in Central America over 7,000 years ago maize sustainined major civilizations from the Olmec, Aztec, Maya, Inca, Iroquois, Navaho, and Zuni.  In the 15th Century, colonization and the Columbian Exchange spread maize to all corners of the earth.


While superfoods are great at introducing new foods to our omnivorous diets, they come with the serious problem of being stripped of their cultural foodways & context.  When corn was globalized during the colonization era (aka "Enlightenment"), the cultural foodways of nixtamalization--storing/cooking it with ash or slaked lime/calcium carbonate to unlock its nutritional value--were not brought with it, which means that untreated corn is largely indigestible. Hence when you eat whole corn kernels, the kernel is visible almost whole as the end product of digestion to put it politely (for the impolite, this means corn poop). 

Nixtamalization. . . The alkaline steeping and wet milling of corn for table use remain distinctly American practices. Although corn has spread across the globe, the preparation of nixtamal and hominy has stayed in the Americas.  "Beautiful Corn: America’s Original Grain from Seed to Plate," by Anthony Boutard
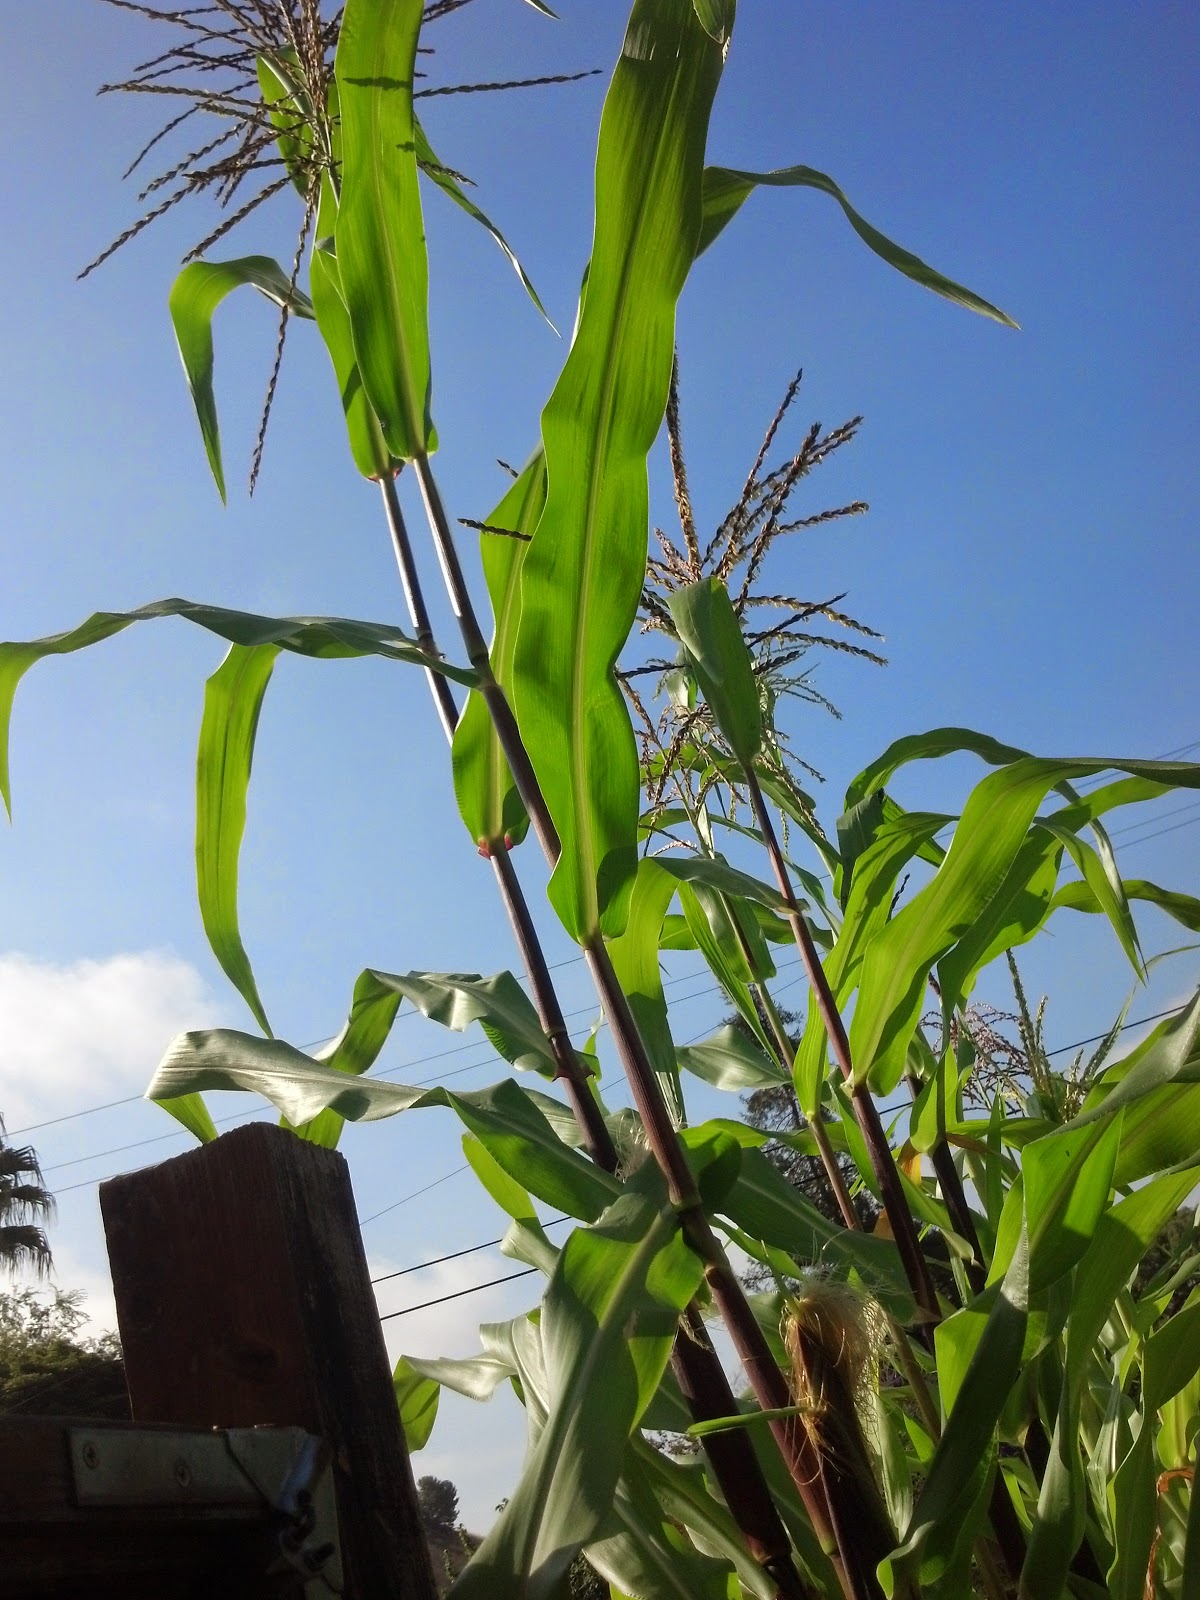
Native corn in my front yard
When maize was introduced as a new crop staple in Africa and Europe 500 years ago supplanting native grains and tubers, the eating of it caused widespread pellagra.  While we'd think in this day and age, we'd have figured out that corn needs to be nixtamalized to be a nutritious staple grain, even still there is a "disease" called kwashiokor in South Africa which only afflicts children who have weaned and eat mostly corn-based food and low protein.  It still befuddles me that the practice of alkalizing maize to make it digestible and nutritious has not been exported to countries where corn has become a staple and thereby prevent widespread famine and nutritional deficiency rather than band aid solutions like niacin fortification after the fact.

Aside: Kinda makes you think about the recent waves of globalized foods and what missing/lost/forgotten foodways may affect its consumption.  For example the practice of sprouting grains and seeds to counteract the anti-nutrients and maximize their nutritional value has largely been lost through industrialization. Get on that UNESCO.


Me and Mrs. Corn, Mrs. Corn, Mrs. Corn

we got a thiiiiiing goin' on.

In Việt Nam, where corn now is the second most important crop after rice, corn is mainly a snack food; corn is eaten untreated on the cob or in chè bắp, and surprisingly, as nixtamal mixed with sweet rice & mung bean (xôi bắp).  I'm not sure when the nixtamalization was introduced and why it is in a delimited way.


I have very fond memories of chè bắp | corn coconut pudding in my childhood.  My ông bà | grandparents grew multi-colored native corn in Việt Nam which was introduced via China tradeways during the Ming Dynasty from the Columbian Exchange over five hundred years ago (sorry Mac from Night Court, corn was not an American introduction) and one of the treats they would make after harvesting is chè bắp.  Stateside, mom would buy sweet corn on the cob and shave off the kernels.  She'd simmer the kernels and the cobs together with sugar for what felt like forever til cooked.  Then she'd remove the cobs and add coconut milk to the kernels, garnishing with toasted sesame seeds.  We 3 kids would fight over who got to gnaw the sweet nubs left on the cobs.  One year when I was 10, I received a small packet of popcorn seeds as something like a cracker jack prize.  We were living with my ông bà ngoại|maternal grandparents, two of my aunties, one cousine, and three uncles that year on Auburn Dr. (I am horrible with dates and had a nomadic childhood, so I mark time by where I lived at the time); we three siblings and mom shared futon mattresses in the living room.  I gave the seeds to my  bà ngoại who along with my ông ngoại had transformed the backyard and the part of the publicly owned hill behind it into a terraced subsistence garden (this is before hipsters mainstreamed urban and guerilla gardening, back when it was denigrated, still illegal and mainly done by people of color, refugees, and immigrants).  My bà ngoại stuck the 3 seeds in a small strip of dirt along the front fence.  I was amazed to watch them sprout.  I don't remember if we ate them but if ông bà ngoại had to stretch the meager ears among 12 people, most likely she made chè bắp.


The girls playing in the husks at the Ardenwood Harvest Festival.
Cut forward 20 + years later to 2012, my family had a playdate with 2 other families at the Harvest Festival in Ardenwood to harvest heirloon, organic native corn.  The refugee/immigrants in us took over and we harvested a grip of native corn ears.  We didn't have a plan or idea of what to do with our booty.  So all the corn languished for a year.  I finally dragged the ears out to an impromptu corn shucking & milling bee at my homesteading girlfriend's house (there is a cosmic reason why shuck rhymes with a curse word and that's because it is brutal on your fingers to shuck dried corn on the cob.  Christina is a good friend).  I used the corn flour to make some delicious violet cornbread.   I reserved a few pounds with the idea of making hominy and a big pot o' pozole which never happened.


My corn rows

Last summer I was still recovering from adrenal fatigue burnout and I felt my energy coming back. I impulsively dug a guerilla garden in our southern-facing front lawn.  Boxed in by the Niles foothills with little tree cover, our southern-facing front yard caught the brunt of the summer sun and was scorching.  So I chose heat-loving heritage crops--watermelons and native corn, and unlike my meticulous husband, I forwent any planning or consideration of soil or knowledge/experience of gardening and dug holes in the previously green lawn.  I forwent any fancy germination, reasoning that putting seeds in the soil is an age-old practice of growing things.  I dug holes,  dropped in a few kernels of my native corn leftovers and a scoop of compost, worm casings.  Later I decided to adopt the Three Sisters model of growing corn to little success (squash did well until it frosted, legumes were way overshadowed).  In spite of me, my corn really thrived.  Losing steam, I didn't harvest it at the peak of ripeness to try eating it on the cob, instead letting it dry for milling and nixtamal/hominy.
Dried & shucked corn kernels

This week my daughter VL's kindergarten class learned about corn;  they learned how to hand grind nixtamal with a metate to make masa, and learned how to hand make tortillas.   I volunteered some beautiful cobs, kernels for planting, and Chè bắp for the potluck Corn Feast.
Gorgeous dried native corn cobs

My contribution will be a more nutritious twist on my childhood favorite--chè bắp using nixtamalized native corn using the method I found from Mother Earth News.  I botched the nixtamal the first time around, but fortunately native corn is forgiving (so not being ironic or apocryphal here) so I did a second round and achieved the right texture.

Nixtamal

The many names of CaO2: 
calcium hydroxide, slaked lime,
pickling lime, builder's lime,
vôi (Việt), choona (South Asia),
cal (Latin America).  Used in
 cooking, chews, gardening, 
and making houses.
This needs to be made in advance of the chè by a couple of days.

Ingredients:

  • 1.5 lbs of dried corn
  • 25 g of pickling lime (2 tbs)
  • water

Put corn kernels & pickling lime in a stainless steel or enamel pot.  Add enough water to cover by two inches.  Simmer on the stove without a lid for 30 minutes to alkalinize the kernels.  Do not boil.  Remove from heat.  Cover with lid and allow to soak overnight.


Simmering in slaked lime

I was making dinner at the same time and ignored the covered pot and when the 30 min was up, I notice it was at a low boil.  Yikes. I left it overnight and went on to the next step of cooking but it was still hard, so I repeated the pickling lime simmering without a lid for another 30 min.  Native corn is coarser than sweet corn so it probably needs more than 30 min to alkalinize.


Pour off the lime mixture into the garden or compost.  Rinse kernels well.   Put into steel pot, cover with one inch of water and simmer for 40-60 minutes to soften.   Salt the water and allow to cool.  Makes about 3 lbs of nixtamal. 

Comparison of dried kernels and nixtamal


Chè bắp hột ngăm vôi | Nixtamal & tapioca pudding


Frozen coconut milk, no additives
Ingredients:
  • 1 lb nixtamal
  • 1/2 cup small tapioca pearls
  • 1/3-3/4 c palm sugar or coconut palm sugar to taste or fruit syrup*
  • 16 oz of coconut milk (recipe here)**
Rinse tapioca pearls.  Soak tapioca pearls in cold water for 20 min.

Boil a pot of water.  When it is boiling add tapioca while stirring constantly so they separate and they don't stick to the bottom of the pan and scorch.  Lower the heat and cook until the pearls are mostly translucent.  Add nixtamal and coconut sugar and simmer for until the pearls are translucent.  The coconut sugar will give this a nice caramel color.  Turn off the heat and add coconut milk. 


*I've recently watched Dr. Robert Lustig's TED talk where he lists the 56 names of sugar.  While coconut palm sugar was not one of the named and has a lower glycemic index, it still is a refined sugar.


**Tropical Traditions recipe for making your own coconut milk here. If you are using frozen,give the package a quick rinse before opening to remove any residue, dirt, etc.


Ăn cho Ngon Lành|Eat Delectably!


Tuesday, October 22, 2013

Sticky brown rice mochi recipe testing

mo·chi

/ˈmōCHē/

a short-grained, sweet, glutinous rice cake with a high starch content, used in Japanese cooking. 

While mochi appears to have been been mainstreamed as a delectable pastel ice cream treat to be had at a sushi restaurant, as a foodway it is actually widespread in Asia with different vocabulary natch, as a sweet morsel filled with beans or seeds and usually connected with traditional celebrations.  Mochi is made from glutinous or sticky rice and symbolizes "good times" in a nutshell.  My MIL makes chè trôi nước--a sweet mung bean stuffed mochi served in ginger syrup for birthdays.  That's party mochi; I have in mind a plain, everyday, savory mochi.


One of my all-time favorite snacks is bánh dầy chả lụa--little rice cakes shaped as the sky according to Viet legend brushed in oil and sandwiched around steamed silky pork sausage and wrapped in banana leaves.  Whenever we were near a Viet deli/bakery, I always grabbed 1-2 for the road.  Since I've stopped eating MSG, I've stopped eating at Vietnamese food places, because inevitably there is MSG in everything especially chả lụa.  I haven't taken my MIL's offer up to teach me how to make chả lụa yet.  Though with a quarter hog in my freezer, I think I ought to calendar that in.

So I was a kid's birthday party this weekend that had the traditional Korean tteok | mochi which was made with brown sticky rice and coated with brown rice powder, some with a sweet sesame seed center.  And I happily ate like a half-dozen after reading the ingredients and making an allowance for sugar (in any case, this was tuned to Asian tastebuds and was not very sweet at all).  My daughter VL got a few too since she couldn't partake of birthday cake.  We took some of the leftovers home and it struck me that it would make a great lunch for VL for school especially since she starts extended kindergarten hours next week.  I scoured the internet which had lots of white sticky rice recipes. lots of traditionally-made-by-pounding recipes, and surprisingly, a lot of microwave recipes.  I finally found this wholesome, macrobiotic brown rice mochi recipe by Jill Ettinger (Organic Authority) which is food processed, steamed, and baked.

So, embarking on my maiden voyage into mochi making.  Here are my testing notes & tweaks. 

Soak the dry rice in water for several hours or overnight. Drain off excess water.
Captain's log.  Stardate 22.10.2013.  I soaked the organic sweet brown rice that I sourced from Azure Standard overnight in my sprout jar.  I think I'll try sprouting the sticky rice grains at some point to maximize the nutrient content (remove phytic acid & arsenic contamination), but this requires planning 2-3 days in advance...


In a strong food processor or blender, process the rice until it makes a smooth, creamy paste.
Mochi dough
Maybe my Kitchenaid is not high powered enough or I drained the rice of too much water or the recipe forgot water.  All I got was crumbly.  So I slowly added 2 tbs of water and it promptly balled up and was more doughlike than paste.  Then I had to take a break and go pick up my daughter from school.  When I came back, I remembered the salt (which is a forgotten step on the recipe) and added it and it all crumbled apart again (probably the water was absorbed into the rice and it dried out).  So I added another 2 tbs of water to get it to ball up.  I suppose I could have added more water to get it to paste consistency, but I liked the easier removal and clean up of the dough.  Sticky rice paste on blades is a P.I.T.A.  But thick dough means a denser mochi so I may try more water next time to achieve a looser consistency and allow the dough time to rest and soak up the moisture.  I'll have to experiment more and see...
Pour the mixture into a bowl or small pot you can steam with in a double boiler (you can also use a pressure cooker for about ten minutes). The rice should steam about 30 minutes or until the mixture gets glutinous and sticky. It should also appear somewhat glossy.
Steamed mochi dough
I started the water boiling in my pressure cooker with the rack and steamer tray inside while I scraped (not poured) the dough and crumbs into a round pyrex container powder-coated with generous amounts of tapioca starch.  To smooth it out, I lightly dusted my hands and the dough with starch to prevent sticking. The starching is where Jill's mochi recipe departs from bánh giầy which is formed into balls, oiled, and steamed on little individual squares of oiled banana leaves.

I set the pyrex in the pressure cooker which was boiling by this time and steamed for 10 minutes.  When the timer went off, I released the steam and voila.  I love my pressure cooker!  Mochi in 20 minutes from grinding to steaming.  The mochi is ready to eat at this point IMO with powdering or oiling.
On a tray dusted with the starch, pour the hot mochi mixture as evenly as possible, about ½ inch in thickness. Let cool before putting in the refrigerator for at least two hours. If you want to make round mochi, you'll need to work with the very sticky dough to form the balls, which is time consuming and worth mentioning again: very sticky.
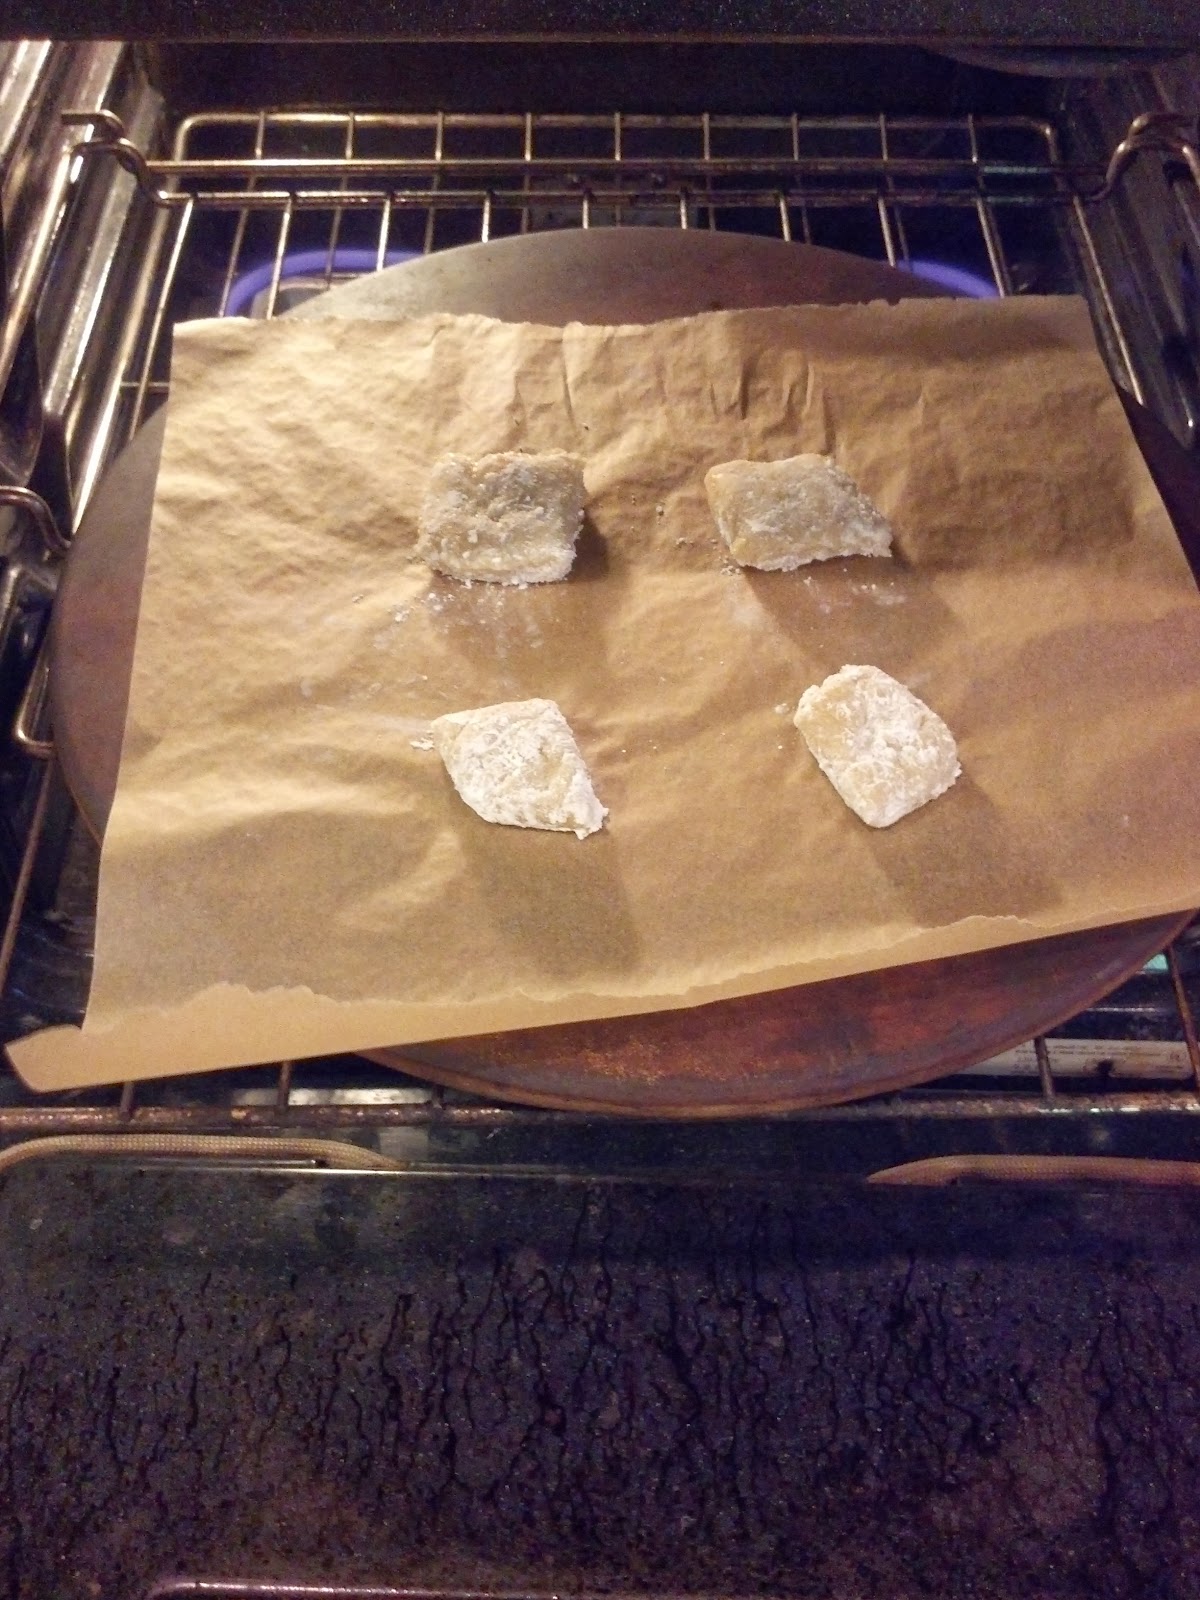
Mochi ready to bake
This is an extra step compared to bánh giầy, but I decided to give it a go and see what happens.  I heated up my oven and since there was a pizza stone inside it from our recent pizza night with Pamela's GF mix (found at a steal $2 at GrocOut), I decided to bake on it with parchment paper rather then swap out.  I moved the dough over to a powdered 7.5 x 5.5 " pyrex container.  It's an extra step and extra dish to wash, but the round pyrex ends up moistened from the steam and not useful for this next task since I wanted even squares.  I  coated a butter knife with starch to make the cutting easier.  Then lifted the squares out and baked them on the aforementioned pizza stone & parchment paper


Puffed up baked mochi!
Mochi "beignet"!
The extra application of dry heat makes the mochi puff up and the outside crisp.  They resembled nothing so much as mochi beignets though the taste is gooey rice goodness!

We didn't have anything but deli roast beef on hand so that's how we did.  We found the mochi a bit too plain so I'm tweaked my amounts to up the gray sea salt (since it is milder than table salt).

I'll work on a  modified bánh dầy recipe forthcoming...


Ăn Ngon Lành|Eat Delectably!

Baked mochi ready to eat
This little piggy had baked mochi & roast beef.  Nyum!